 |
armapi
v1.0
bêta
|
 |
armapi
v1.0
bêta
|
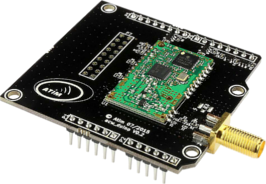
The hardware is composed of acw-duino shield and a antenna, coupled at your Arduino.

The installation is easy. The first step is to download the API packages. You can find it on the Github page.
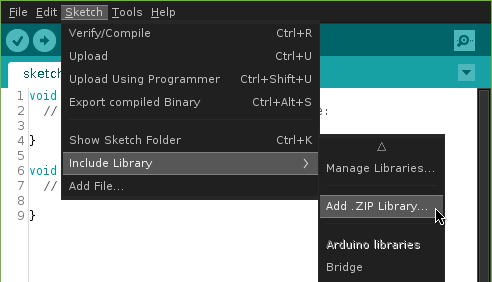
Run you arduino IDE and go to a menu Sketch->Include Library->Add .ZIP Library...

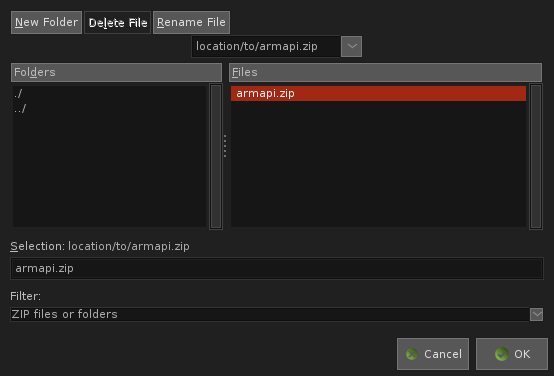
Now, chose the armapi.zip file you just download.

And it is finish, the library is installed.
This documentation is generated from the c binding source, but it easily to understand for a cpp. In c, each functions name start by 'arm' and the first argument is a pointer to arm structure. In cpp, it were replace by the Arm class.
For example to set a mode:
In c, some functions don't need a structure, in cpp this function is converted in static method.
For example to get a max power:
Now you are ready to start to write a code. The API require to work a serial link. On Arduino, you must use the Serial object and give this object to the API with the Init method. Before it, you need to instanced the Arm object.
You can check the error returned by the Init method to know if the initialization is successful. The Init method detect automatically the arm type (armType_t) and the library adapts itself. For example, the method LwGetConfirmedFrame() has no effect if the type is no ARM_TYPE_N8_LW, there is not reason to use this method if you ARM don't support the Lora network.
About the name of methods:
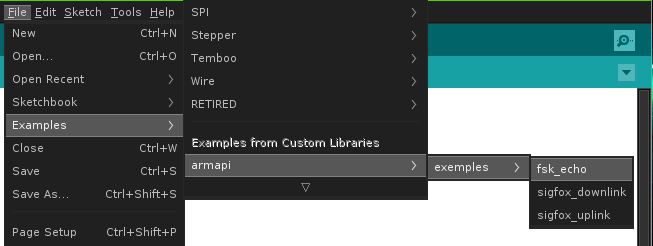
After have installed the armapi you can access and test directing the examples give by the Arduino package. For this go to File->Examples->armapi->example->... menu.

This example send periodically 'Hello Sigfox' to Sigfox network.
arduino/sigfox_uplink/sigfox_uplink.ino
This example send periodically 'Hello Sigfox' to Sigfox network and get the message from sigfox to on/off the led. The first byte is user to switch on/off the led.
arduino/sigfox_downlink/sigfox_downlink.ino
This example make a radio echo on the radio channel 4 with 9600bps radio speed.